3d black and white pencil drawings for beginners
In this light and shadow series, we wait at the theory, drawing and painting of a elementary class focusing on shadow, calorie-free and edges.
in Part i, we looked at the theory of light and shadow.
This week nosotros're going to put pencil to paper and run into how the theory works in a uncomplicated pencil drawing of an apple…
Understanding your light source
The unlike characteristics of the light hitting an object can completely alter its advent.
For this demonstration, I've created a lighting prepare using one single light source which gives united states of america a predictable fall of light.
This set up up demonstrates each distinct surface area to be aware of, exaggerating the widest tonal range, and when you lot're a beginner, information technology's the simplest fashion to come across the deviation between the tones.
My lamp has a diffuser on information technology called a Softbox.
The Softbox gives usa the fall of lite we're subsequently, yet slightly softer edges on the shadows.
Why?
1 of the key lessons from this demonstration I desire you to come away with is to understand the importance of soft edges in your drawings.
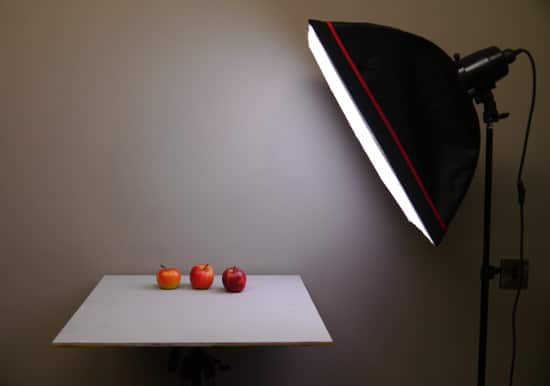
Softbox single source lighting set upwardly in my studio
The importance of hard & soft edges
An edge is where two objects or 2 surfaces meet together.
The term a 'hard edge' tin depict ii very hard surfaces, such as a tabletop with a metal cube on tiptop of it or well-nigh commonly in drawing, we talk about the hard border being an area that has a sharpness to information technology or a focal bespeak of the film.
So, it could be a crisp line to point changes in shape or angularity.
Or it could be an surface area of high contrast (light and night) to draw the viewer's attending.
A 'soft edge' is more flowing or fluid and tends to be more low in contrast. Soft edges propose the idea of roundness and a gradual transition.
In photography, lighting tin can often be called hard light or soft lite. Difficult light is harsh lite so creates sharp shadows and harder edges.
Soft calorie-free is very diffused, creating softer shadows and softer edges. And so if you lot wanted to photograph somebody in the most flattering lite, you would have soft light. If yous want to increase the dramatic quality of the scene, you lot would use difficult light.
This one slice of information that can drastically alter your drawings and paintings.
So as we go through the next demo, I'll indicate the areas to go on soft and the areas to keep sharper.
1 of the biggest mistakes beginners make in drawing, is keeping all of the edges the same – most normally, all of the edges are kept sharp and crisp.
If you lot can learn to alter the weight of line and to incorporate more soft edges in your drawings, it volition make a massive difference to the realism and style of your work.
Shadow edge
Below are ii photographs to illustrate the subtle differences in the shadow strengths when I contradistinct the lighting slightly.
The get-go one used directly sunlight because it's not diffused; it has created a harder, more solid shadow line and cast shadow.
Also, see how you can judge the angle of the sun via the length of the bandage shadow and the bright highlight.
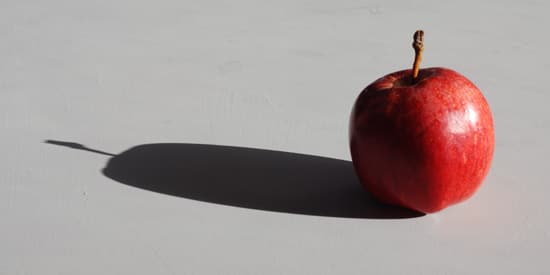
Low bending, difficult lighting from direct sunlight.
The second one used a slightly higher lighting position with a softer low-cal creating a softer cast shadow border.
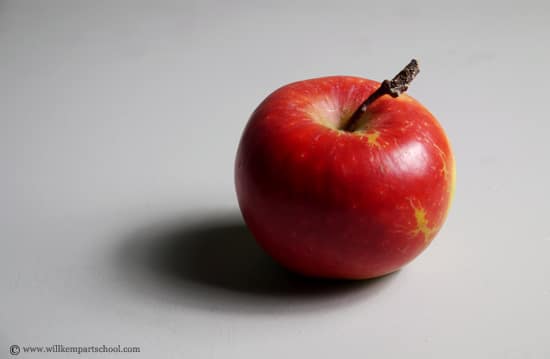
High, softer diffused lighting from a single calorie-free source Softbox
The image above is the concluding reference image I'll employ for this sit-in.
Information technology tin can exist 'right clicked' and 'Salvage image as', then you can utilise it as a reference for your drawing.
Domicile setup
A small table lamp without a shade is a good choice for setting up your still life at habitation, if you desire to work from life, rather than the photograph above.
An opaque bulb will give you a lite source in between the ii examples above. O.k – you won't have a diffuser to mimic a Softbox – but it won't be as difficult every bit straight sunlight either.
Simplifying your drawings by mapping the shadows
Before we get started on the main upshot, here'south a really quick style of practising looking for the shadow line.
Don't underestimate its importance because of its simplicity.
It'south often the showtime sketch that is the most effective at conveying the sense of form rather than an overworked, detailed cartoon.
However, working with pencil, subtleties can become added into the scene (that are there) too early, and the simple stardom between light and dark gets lost.
During this exercise, you lot have to make a articulate stardom between calorie-free and dark because you are using a pen – helping to forbid the separation from becoming muddled.
Pro tip: Working with a permanent marker pen is the best method I've found for practising this technique. It forces you lot to make a clean decision in your heed before committing pen to paper.
This sketch is based on the Cézanne painting from last calendar week. I'm using a black, fine line gel pen. This ane is 0.5 mm from Muji.
I sketch out the outline of the object and then put in both the cast shadow and the shadow line.
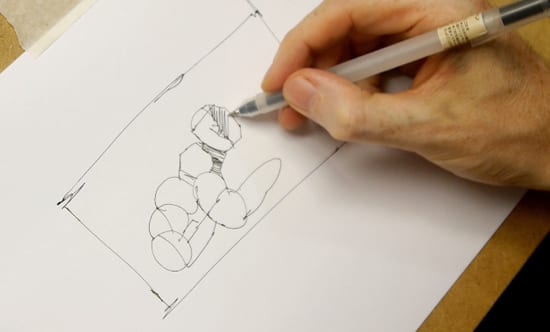
I tin can then bespeak the shadow side past hatching lines with the pen.
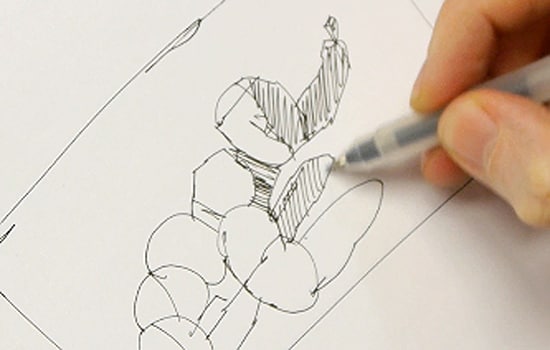
I'thou keeping the lines evenly spaced and irresolute the direction of them, depending on the management of the grade. Notice how all of the bandage shadows on the tabular array are hatched in the aforementioned direction.
I then draw in whatsoever darker accents on the bottom of the objects.
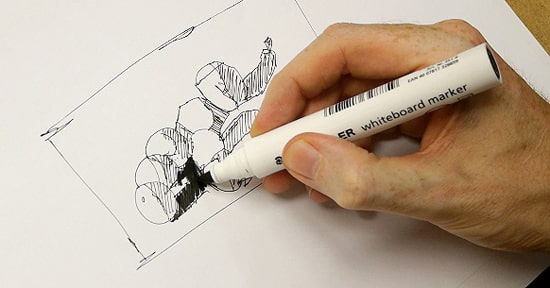
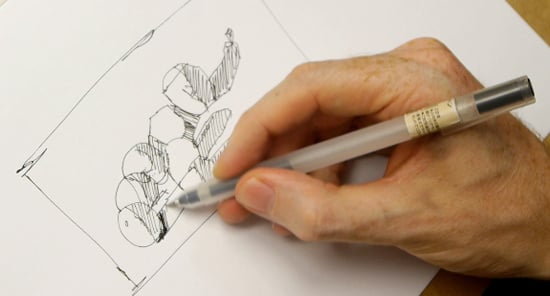
And once I'm confident with the general shapes and shadow patterns, I piece of work with a thicker pen (this is a Staedler whiteboard marker) to indicate the very darkest cast shadows inside the drawing.
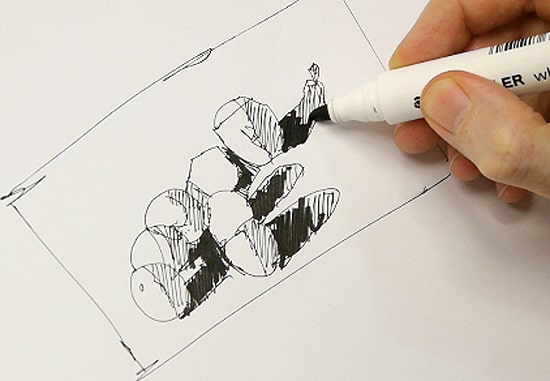
So now I take iii tones, the lights, the grade shadows and the cast shadows.
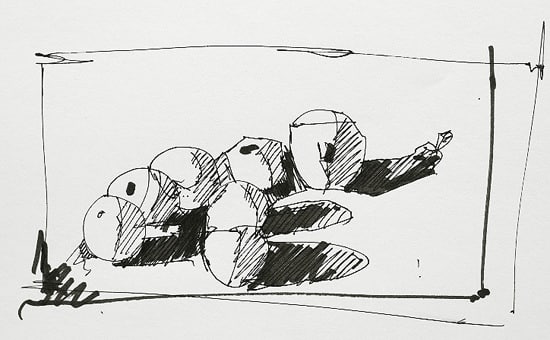
This has only given me a really good thought of the shadow patterns within the scene. It can be a groovy practise to do if you're out in bright sunlight as you tin get distinct shadow shapes.
And then at present your eyes are tuned in, let's become on with the form cartoon using a pencil.
How to describe a three-dimensional Apple
Materials you volition need:
- White paper, either regular reckoner paper or cartridge newspaper
- 2B & 6B pencil – I utilise Staedtler Mars Lumograph
- Eraser – I utilize a putty eraser
- A circular object to draw effectually (approx 7cm wide)
- A tortillion – I use a paper stump, which is very similar to compressed paper.
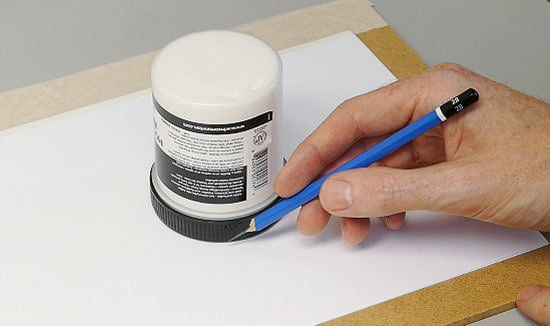
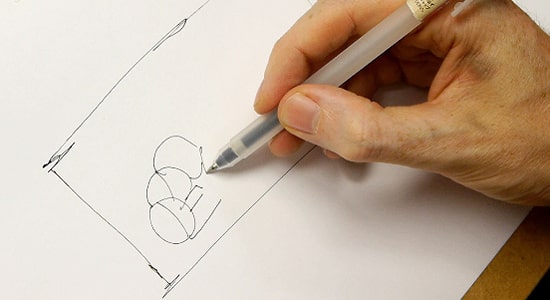
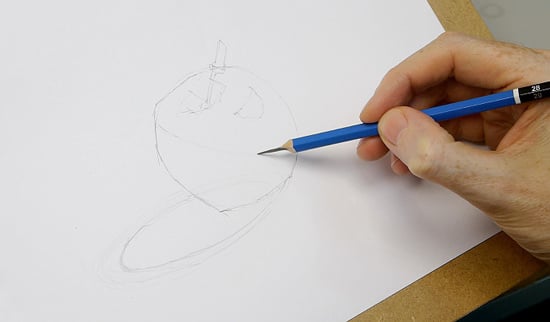
Notice a circular object to draw lightly effectually; this helps to give you a starting signal then we can quickly put into do the theory of the sphere from last week. I'm using to 2B pencil (Staedtler Mars Lumograph)
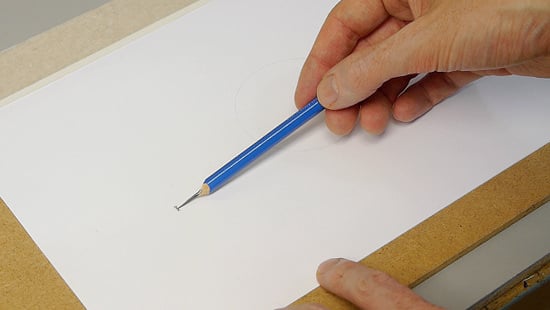
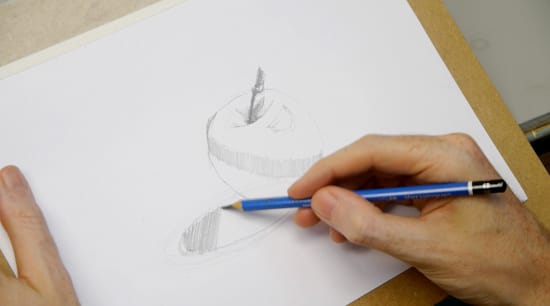
I then make a mark indicating the furthest point of the cast shadow.

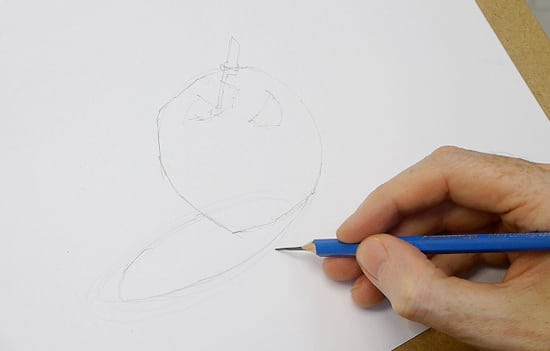
Lightly describe an ellipse shape to signal the cast shadow. Notice how the ellipse cuts through the shape of the circle.

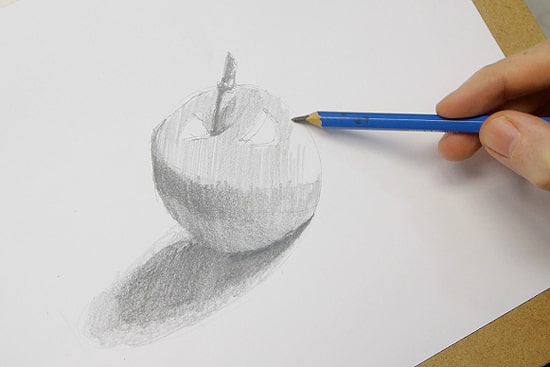
I now use a difficult line and add slight angles to the circumvolve, to represent more accurately the shape of the apple.
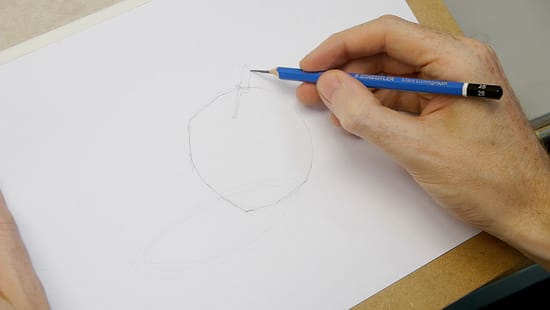
Lightly draw in the shape of the stem.
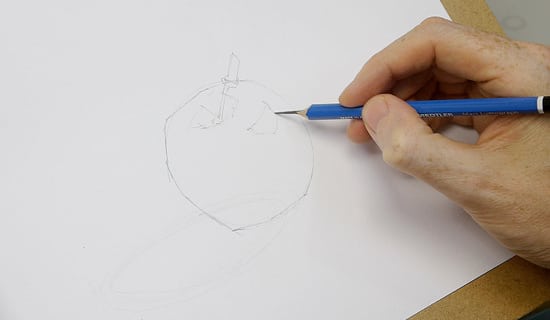
And then the shape of the highlight.
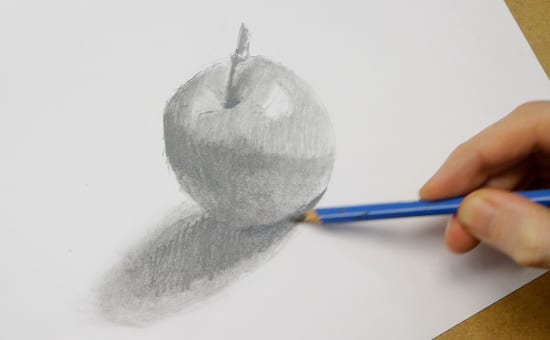
Reinforce the cast shadow shape noticing – the darkest part that sits directly under the apple, the mid-tone that makes up the bulk of the cast shadow shape while keeping a lighter line as you get towards the brightest, softest tail of the cast shadow.
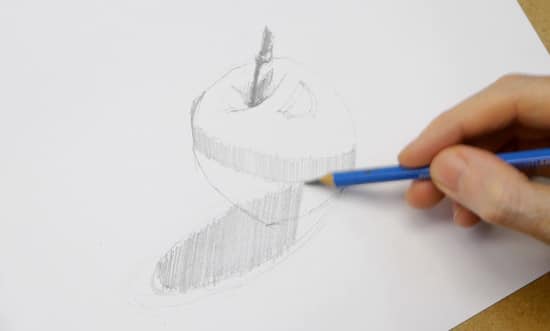
Lightly draw the shadow line; information technology has a slight curve to it.
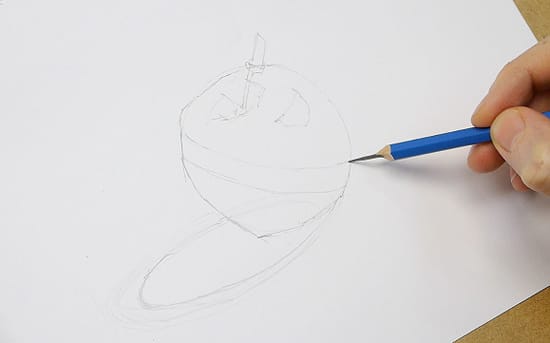
The curved line below the shadow line indicates a ring where the grade shadow core falls within. This will exist the darkest surface area of the apple tree.
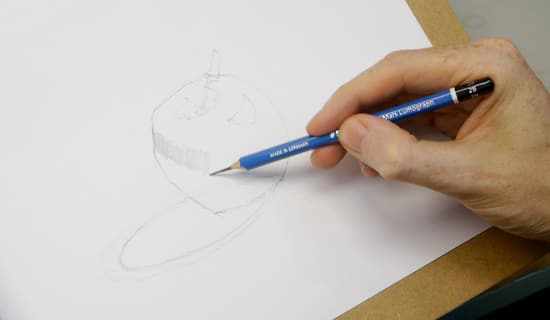
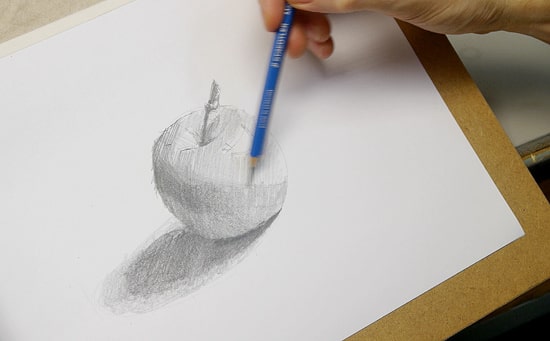
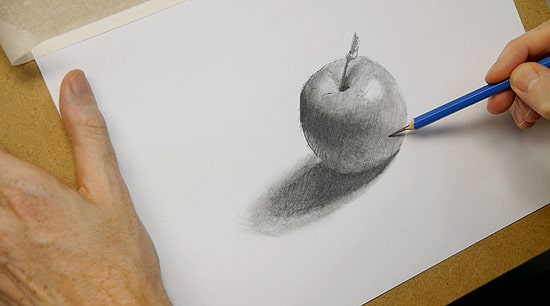
I then shade a mid-tone along this form shadow core. Even though it's going to be darker than this eventually, it will aid you to judge the dissimilar tones within the drawing.
Shade the apple stalk equally dark every bit you tin get information technology, it's practically black on the reference image and it doesn't demand to blend into whatsoever other tones – so we can afford to become equally night as possible.
Now I swap to a softer pencil (a 6B) and begin to shade in the majority of the cast shadow. Detect how the angle of the shading is the same as when I hatched the bandage shadow in the shadow mapping drawing using a pen.
Go along the shade over the edge of the apple, and this is chosen combining the shadow shapes.
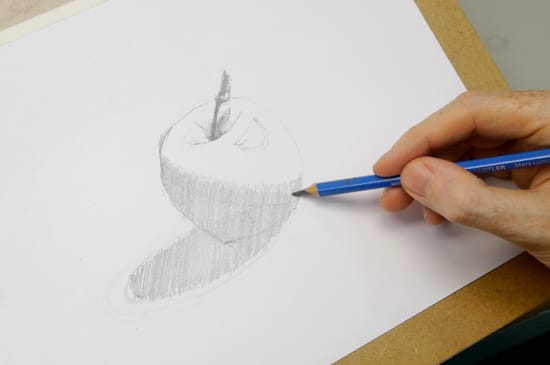
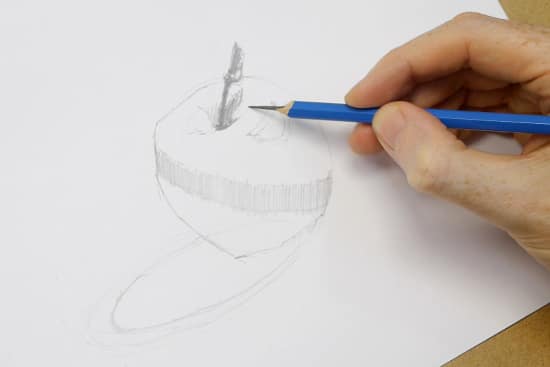
I fill up in the form shadow, working over the start, form shadow core band.
It'due south at this point I swap back to the 2B and draw the hard, precipitous line at the base of operations of the bandage shadow.
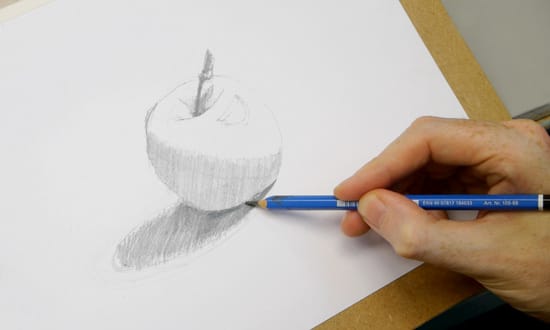
Using the softer 6B pencil, I reinforce the cast shadow depth of tone.
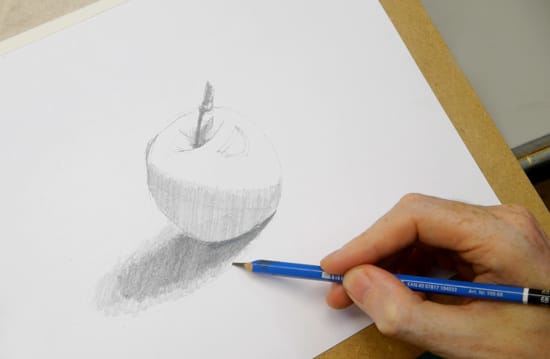
Holding the pencil lightly, I gently signal the softer, lighter tail of the cast shadow.
Now I experience confident to go heavier on the form shadow core as I have both the night cast shadow and the night stalk to estimate against.
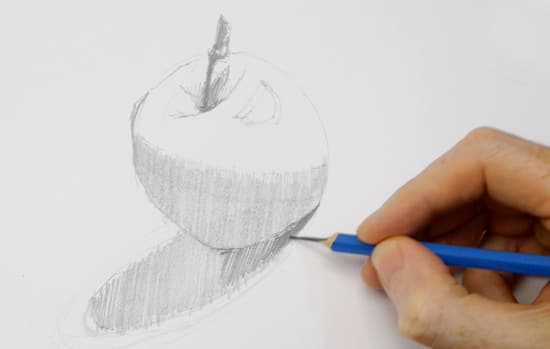
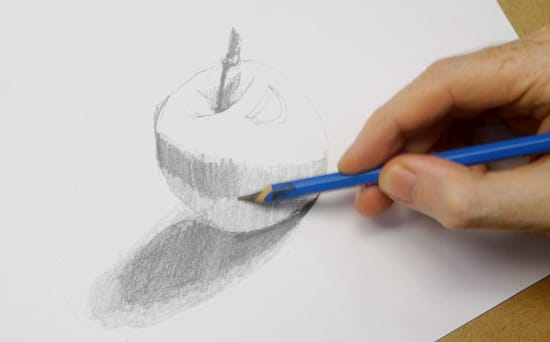
Changing hand position, I can follow the shape of the class.
Lightly work across the whole of the calorie-free side to indicate the halftone.
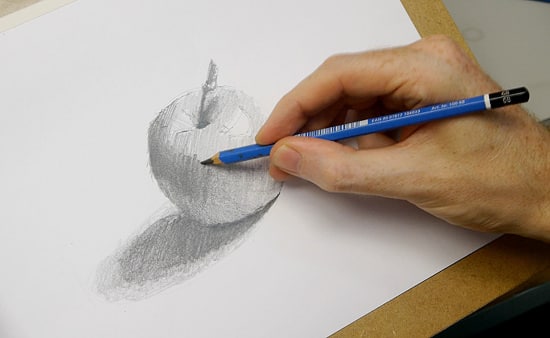
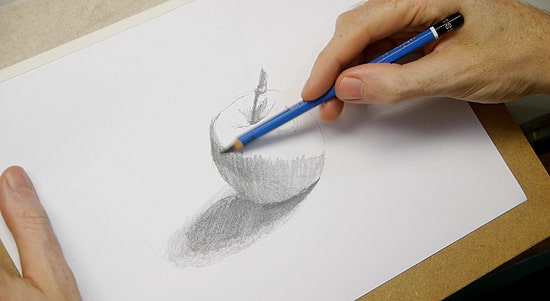
At present we have established all the elements.
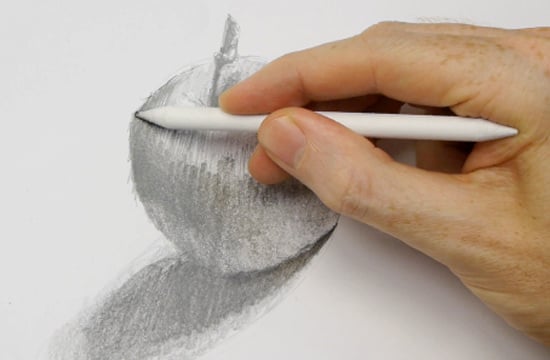
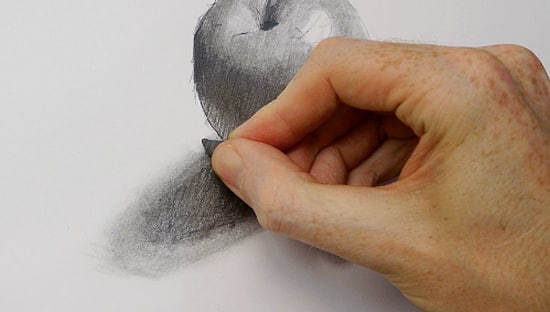
Using our secret weapon, our paper stump I start to blend the tones to reach the soft transition between the calorie-free side and the shadow side.

Notice how when you shade with the newspaper stump, it slightly darkens the tone.
I keep to work between softening and sharpening and blending.


Using a putty eraser, I take back any of the shapes that have gone slightly out.

Soften out the tail of the cast shadow.
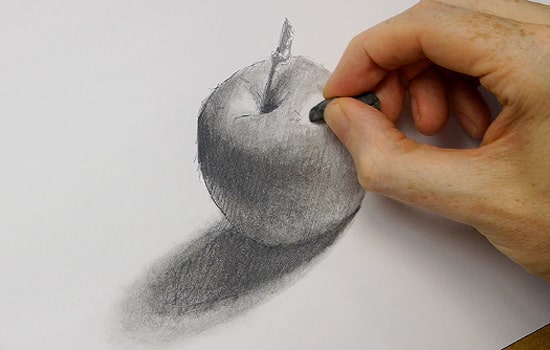
Pull back the highlight on the light side of the apple.
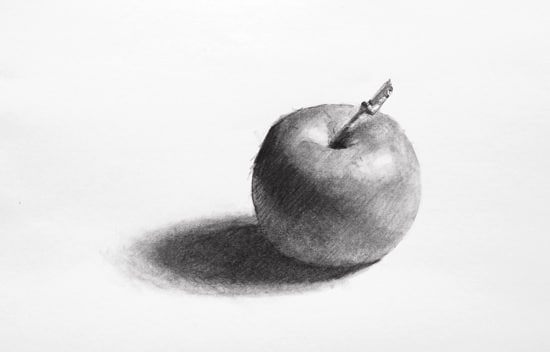
The finished drawing.
Whether y'all download and employ the reference prototype or gear up up your study, take it a step at a time, look out for the soft transitions, and I hope you get some fantastic results!
Next time we'll be back in the studio where we'll develop this apple tree study into a unproblematic contemporary painting.
If yous'd similar to learn more almost sfumato and drawing techniques, you should have a await at the How to describe light & shadow online drawing grade
Y'all might also similar:
one. A Beginners Guide to Light & Shadow: Function 1
2. A Beginners Guide to Light & Shadow: Part 3
Source: https://willkempartschool.com/how-to-shade-a-drawing-light-shadow-part-2/
0 Response to "3d black and white pencil drawings for beginners"
Enviar um comentário